

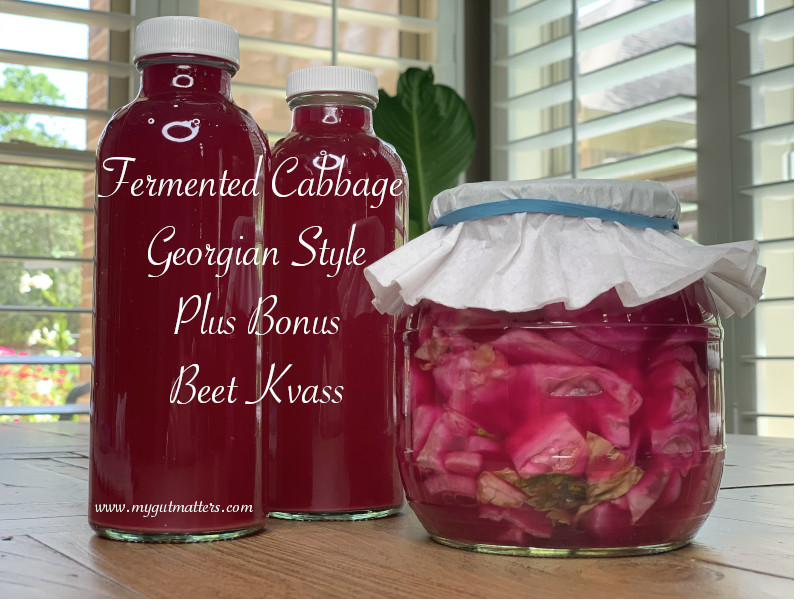
If you are new to fermentation and looking for an easy and quick recipe of fermented cabbage then this is the one. This cabbage is unbelievably yummy and offers extra benefits due to the beets and a beet kvass as a bonus which cannot be wasted.
I have shared before my staple recipes of white cabbage fermented with kombucha and an old fashioned sauerkraut recipes that are always a hit among my family, friends and followers but this recipe is our new favorite! It combines the benefits of sauerkraut but also gives you a bonus beet kvass because two main ingredients are cabbage and beets. You can read about the benefits of beet kvass and even make your own using this recipe but to save you some time just make this cabbage and you will get both!
The benefits of sauerkraut are just enourmous. And sauerkraut is one of very few fermented foods whose benefits were tested in a recent clinical study with functional bowel disorders. This study showed that regular consumption of unpasteurized on a daily basis improves the symptoms of IBS (irritable bowel syndrome).
Things to do before fermenting
It is important to follow certain guidances so please follow the recipe especially if it is your first time.
- Avoid using harsh chemicals in your kitchen and home in general because these toxic chemicals will harm your health, your home microbiome and may negatively effect your fermentation process by killing all the beneficial and neutral (not harmful) bacteria in the air. I love using microfiber cloths for that.
- Do you homework and study the process of fermentation. There is a great book by Sandor Ellix Katz – The Art of Fermentation. I highly encourage to read it if you are a nerd and would like to get to the bottom of fermentation.
- Make sure your dishes and hands are clean! Do not skip this step!
Equipment:
- Glass Fermentation Crock (5L) – Mortier Pilon is an easy to use crock for fermenting any vegetables. It is made of glass so you can watch the process which is really cool! It does include the weight and the recipe book which can be helpful for the beginners.
- Glass Jar (1.5-2 L ) – these are my favorite wide neck jars. They are extremely convenient when you are trying to pack a bunch of sauerkraut in them.
- Slicer – madoline from Boner is is going to be money well spent and will serve you many years. Thinest setting on the slicer is my favorite.
- Kitchen scales is also a must have item for any fermenter!
- Cutting board to cut cabbage heads into quarters
- Knife
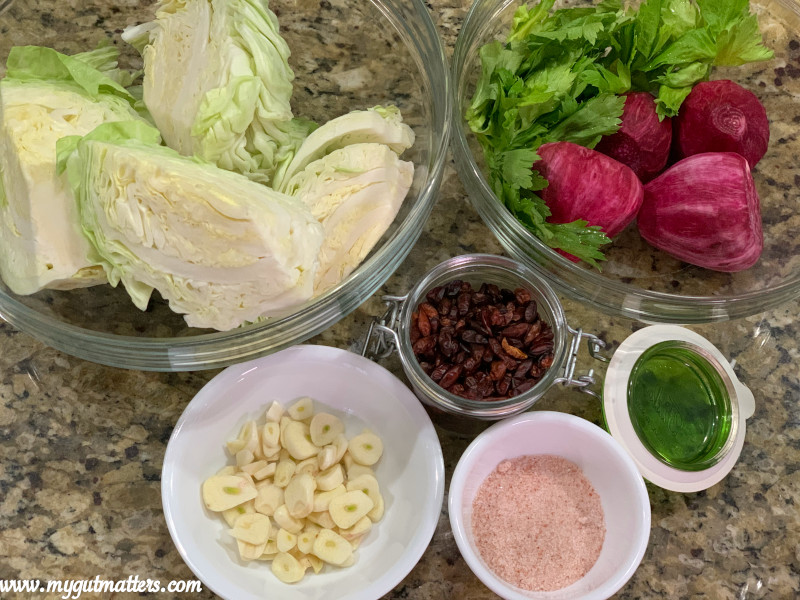
Ingredients:
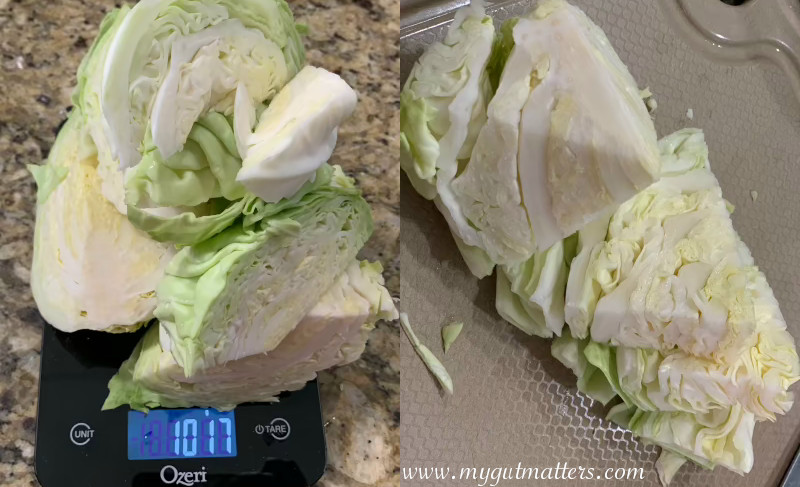
- 2 pounds of White Cabbage (2 pounds = about 1 kg)
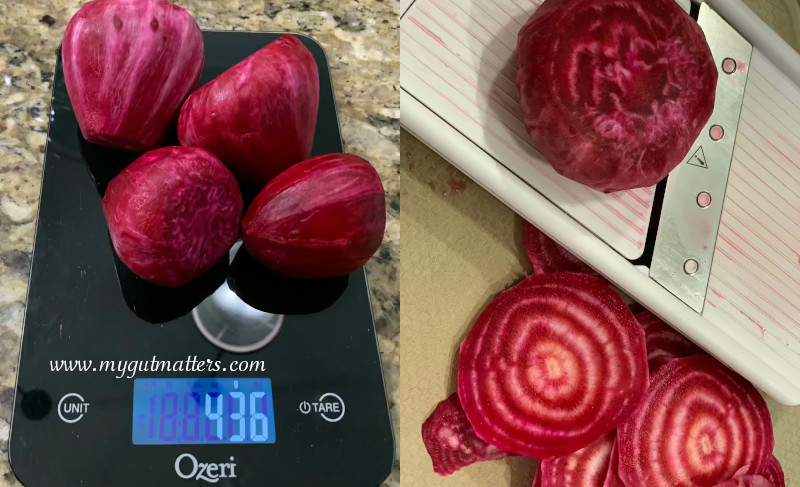
- approximately 1 pound of peeled beets (1 pound = 0.5 kg)
- 1 oz (34 g) peeled garlic (I had approximately 10 cloves)
- 1 oz (36 g) celery leaves
- 50 g Himalayan Sea Salt
- mini hot peppers to taste
Preparation method:
- Wash and cut your cabbage into large pieces.
2. Wash, peel and slice your beets using mandoline. I used the ones harvested from my garden. So it brings me an additional level of goodness.

3. Wash and cut the rest of the ingredients (garlic and celery leaves).
4. Start layering vegetables. First cover the bottom of the jar with slices of beets. Then layer them with a layer of cabbage. Place on top some celery leaves, sprinkle some garlic and hot peppers.
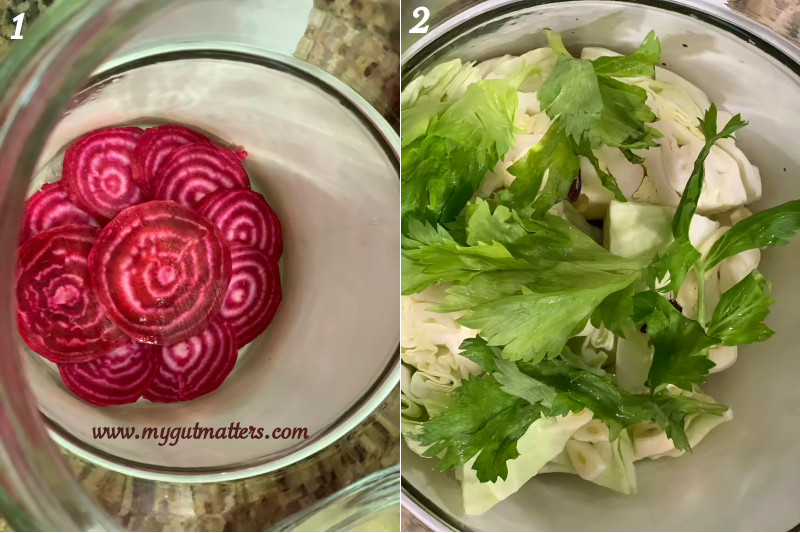
5. Repeat the same procedure with the rest of the vegetables. I usually have 2-3 layers.
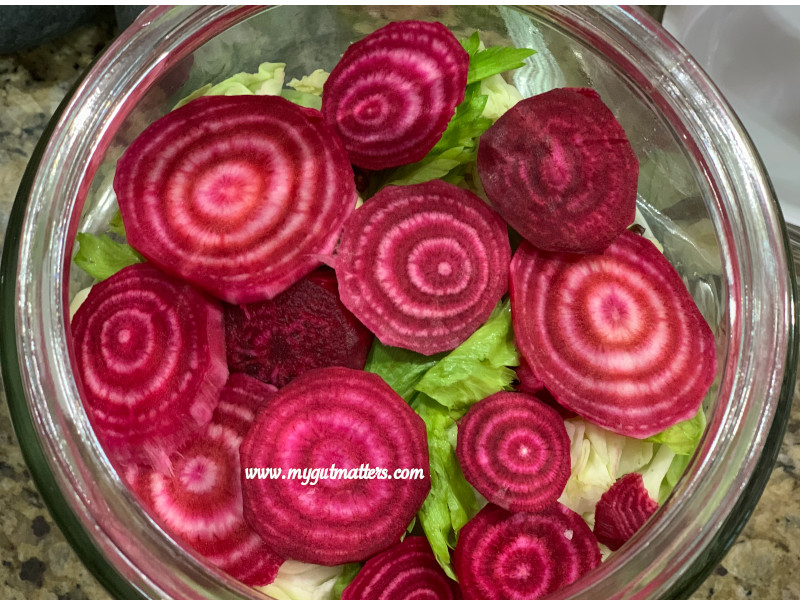
This is how all the layers look from the side.

Subscribe to our newsletter!
6. Boil 1 quart (1 liter) of water. Dissolve 50 g of salt in it. This is your brine. Let it cool and then poor over the cabbage. The cabbage has to be completely covered with this brine.
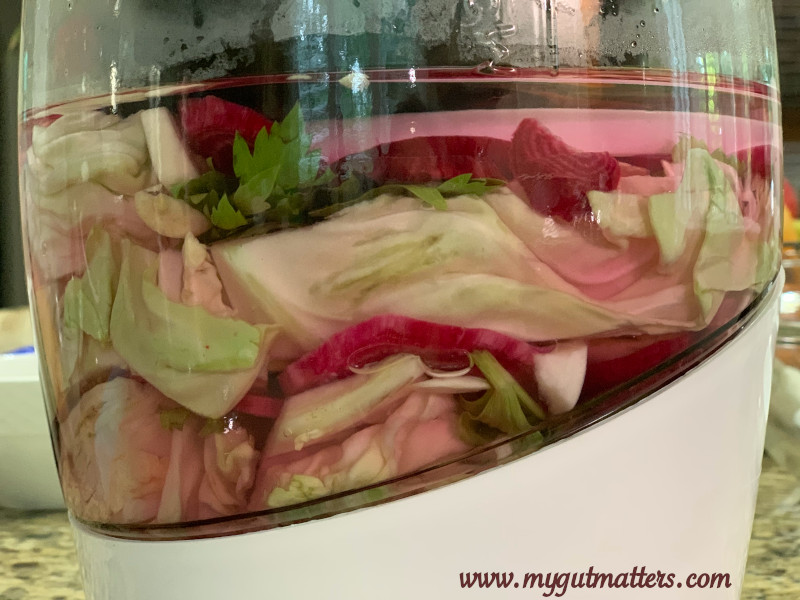
7. Cover the cabbage with some weights. I use the weight that was provided with the crock plus on top of that I place two river stones on that weight.
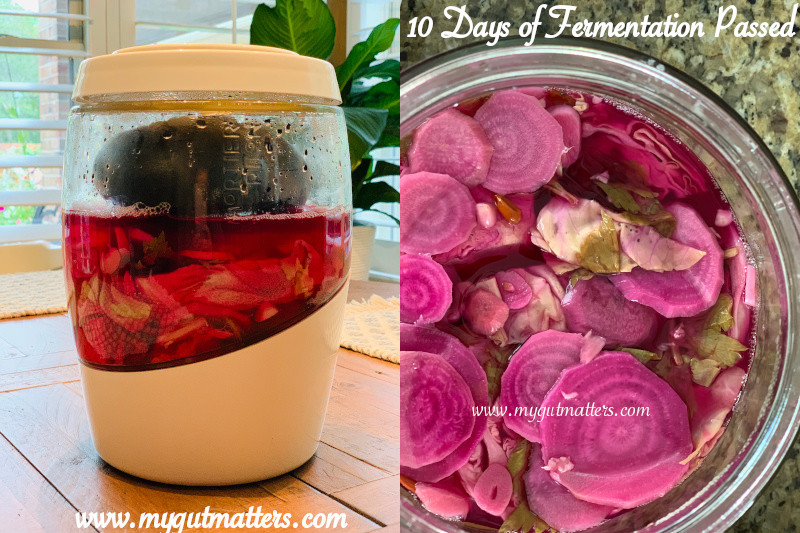
8. Let it sit on your countertop for at least 10 days. Believe me you do not want to shortcut this step. The chunks of cabbage are big therefore it will take more time for the microorganisms to get through all that cabbage. The longer you ferment the more lactic acid bacteria you will have in your cabbage. And that is what makes any fermented vegetable extremely beneficial. The picture on the right shows exactly how your fermented cabbage will look like in 10 days.
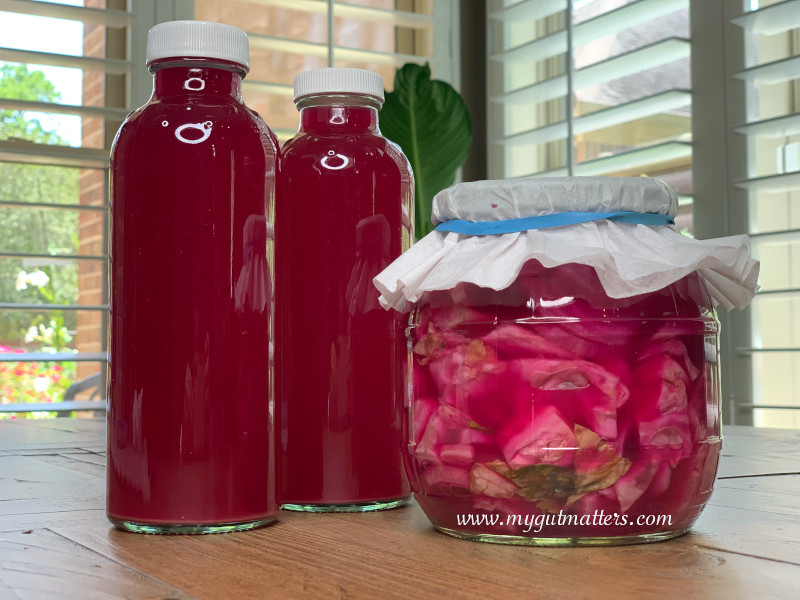
9. 9. Take the cabbage from the crock and place it in an air tight glass jar for storage in the refrigirator.
10. You will probably get more brine than you need to cover your cabbage. So you can filter the brine and poor it in a glass bottle for drinking purpose. Believe me it’s incredibly yummy and such brines are sold at Whole Foods for about $5 a bottle. Enjoy!
Are you hungry for more? Subscribe to my mailing list to receive news and new recipes right into you mailbox here.
Fermented Cabbage and Beets Georgian Style
Equipment
- Glass Fermentation Crock (5L) with Weights
- Veggetable Slicer (Borner Mandoline)
- Veggetable Slicer (Borner Mandoline)
- Sharp Knife
- Kitchen Scales
Ingredients
- 2 Pounds White/or green cabbage about 1 kg
- 1 Pound Beets about 400-500 g
- 1 oz peeled garlic 34 g or 10 cloves
- 1 oz celery leaves You can use more. That was all I had.
- 1.8 oz Himalayan Sea Salt or 50 g
- 10 pieces Mini hot peppers I used dried, but you can use freshloy sliced too
Instructions
- Wash and cut your cabbage into large pieces.
- Wash, peel and slice your beets using mandoline.
- Wash and cut the rest of the ingredients (garlic and celery leaves). You can use more celery leaves if you like. I did not have anymore so I used all I had.
- Start layering vegetables. First cover the bottom of the jar with slices of beets. Then layer them with a layer of cabbage. Place on top some celery leaves, sprinkle some garlic and hot peppers.
- Repeat the same procedure with the rest of the vegetables. I usually have 2-3 layers.
- Boil 1 quart (1 liter) of water. Dissolve 50 g of salt in it. This is your brine. Let it cool and then poor over the cabbage. The cabbage has to be completely covered with this brine. This can be done in advance so that by the time you have all the veggies layers you can used colled down brine.
- Cover the cabbage with some weights. I use the weight that was provided with the crock plus on top of that I place two river stones on that weight.
- Let it siton your countertop for at least 10 days. Believe me you do not want to shortcut this step. The chunks of cabbage are big therefore it will take more time for the microorganisms to get through all that cabbage. The longer you ferment the more lactic acid bacteria you will have in your cabbage. And that is what makes any fermented vegetable extremely beneficial. The picture on the right shows exactly how your cabbage will look like in 10 days.
- Take the cabbage from the crock and place it in an air tight glass jar for storage in the refrigirator.
- You will probably get more brine than you need to cover your cabbage. So you can filter the brine and poor it in a glass bottle for drinking purpose. Believe me it's incredibly yummy and such brines are sold at Whole Foods for about $5 a bottle. Enjoy!
Great site. Tons of useful information.
Quick question – a brownish cap keeps forming at the top of the two mason jars I am using. I scrape it off and add water to cover each day (we’re on day 5). It is not happening with two jars with screw tops.
Am I correct to assume that the mason jar seals are not working and that air is getting in?
Dear, Michael, I am so sorry I missed your message. I would live that brownish cap for now and then remove it. I hope this is what you did.regarding the air you are right – the air gets in and particular microbes begin fermentation. They are not necessarily bad but these bacteria are not what we are looking for in a fermented product.